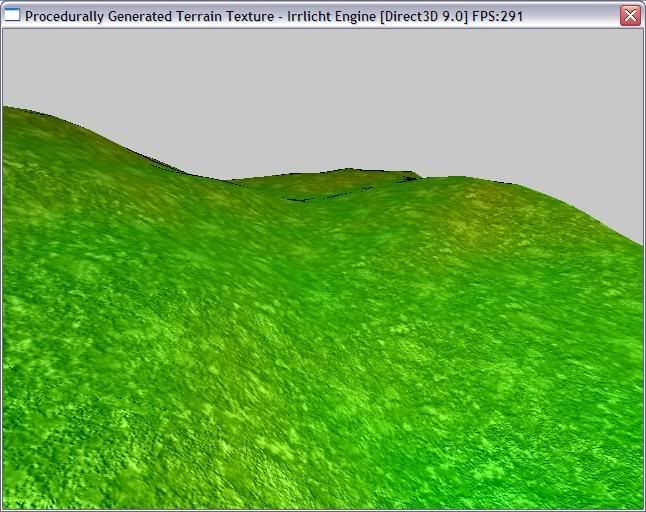
Just like the subject says... procedural terrain texture generation. The colours in the texture are based on the height and slope of the terrain. It would not be hard to adjust the formulas used to determine the colours; even to make snowy mountains, sandy lake/sea/ocean beds, or hot pink grassy planes on some alien world.
ITexture *generateTerrainTexture(IVideoDriver *driver, ITerrainSceneNode *terrain)
{
	// Create the texture we'll use on the terrain
	// NOTE: The texture is 128 by 128 while the terrain is 129 by 129.  There are a couple of reasons
	// for this.  First it's better for texture sizes to be a power of 2.  Second this size lets us work
	// with the texture and terrain together as if each pair of triangles on the terrain is one pixel on
	// the texture.  It also gives us a bit of room when calculating slopes.
	ITexture *texture = driver->addTexture(dimension2d<s32>(128,128), "texture", ECF_A8R8G8B8);

	// Check if the colour format is what we expect.  IVideoDriver::addTexture() does not have to
	// use the colour format you specify so it must be checked.  Obviously it would be better to
	// generate a texture for all the colour formats but for this example I wanted to keep the whole
	// process simple.
	if (texture->getColorFormat() != ECF_A8R8G8B8)
		return NULL;

	// Lock the texture we created earlier so we can work on the data
	u32 *texData = static_cast<u32 *>(texture->lock());

	// Base color of black
	u32 color = 0xff000000;

	// For each point on the texture
	for (int x = 0; x < 128; x++)
	{
		for (int y = 0; y < 128; y++)
		{
			// NOTE: X and Y for the texture are X and Z respectively for the terrain.  I've tried to
			// keep my variable naming consistant based on whether the variable is referring more to the
			// terrain scene node or the texture.  But most things refer to both so Y and Z are used
			// somewhat interchangably.

			// Grab the scale of the terrain
			f32 xScale = terrain->getScale().X;
			f32 yScale = terrain->getScale().Y;
			f32 zScale = terrain->getScale().Z;

			// Calculate the slopes in the x and y directions
			// Another option would be to find the normal vector for the area being worked on
			// and using the y component as the slope.  This would also let you skip the next step
			// as the y component of the normal would always be positive.
			f32 xSlope = terrain->getHeight(x*xScale, y*zScale) - terrain->getHeight(x*xScale + 1.0f, y*zScale);
			f32 ySlope = terrain->getHeight(x*xScale, y*zScale) - terrain->getHeight(x*xScale, y*zScale + 1.0f);

			// Calculate the absolute values of the slopes
			xSlope = abs_<f32>(xSlope);
			ySlope = abs_<f32>(ySlope);

			// Calculate the red color based on slope
			// Steeper = more red
			s16 red = static_cast<s16>((xSlope > ySlope ? xSlope : ySlope) * 128);

			// Calculate the green value based on height
			// Lower = more green
			s16 green = 255 - static_cast<u8>(terrain->getHeight(x*xScale, y*zScale) / yScale);

			// Just set the blue
			s16 blue = 0x00;

			// NOTE: You can change the way the colours are calculated to adjust the results
			// but you should make sure to leave in the clamping I have applied so the colour
			// compilation below will work.
			clampColours(red, green, blue);

			// Build the colour and set it in the correct place
			texData[x+128*y] = color + (red << 16) + (green << 8) + blue;
		}
	}

	// Unlock the texture so it can be used
	texture->unlock();

	// Return our pointer to the newely created texture.
	return texture;
}
EDIT: clampColours() just fixes each channel into the rage of 0 to 255.
Ignore the black artifacts on the ridge. This picture was taken on my laptop with its crap video hardware.
Last edited by Frosty Topaz on Sun Dec 02, 2007 8:12 pm, edited 1 time in total.
Frosty Topaz
=========
It isn't easy being ice-encrusted aluminum silicate fluoride hydroxide...
by the way, it would be nice to experiment with shadowmapping or lightmapping against your code, though i'm still figuring out how that will get implemented.
right at the moment, my gut feel is to use a fragment shader using the light source.
anyway, let me know if there are ways of doing this, i'm sure blender 2.45 can do shadowmapping as well.
Well a simple lightmap would be easy. Just calculate normals, choose a direction/colour for the light and a quick dot product tells you all you need to know.
Doing a proper shadowmap would be more complicated. I'd probly use ray tracing. You could even do it in Irrlicht without too much difficulty. But it may be slow enough that generating it first and then saving it would be the only reasonable way of using it.
Do note though that with my implementation the texture is very coarse. You only get 1 pixel per "tile" of terrain. But that should be pretty easy to overcome.
If you're interested give it a try. And if you need a hand let me know.
Frosty Topaz
=========
It isn't easy being ice-encrusted aluminum silicate fluoride hydroxide...
For terrains, there is an extremely fast way to do shadow mapping, but it only works if the light rays are travelling parallel to one edge of the terrain. Basically, for each row, you set the current y position the first height value of the first vertex. Then, you go through all the vertices in that row. Every time you advance a vertex, you decrease the current height by the gradient of the light rays. If the new vertex is higher than the current y position, you set the current y position to the new height. If the height of a vertex is below the current height, it is in shadow.
very cool indeed, I will be modifying this once I get my uvmapped texture to work on terrain and I'll post the source here if you don't mind, basically once the multi-texturing works with uv mapping I can use the gradient of the map, play with the levels and create a uvmap from the heightmap to have textures for different terrain levels with obviously rock as the base non uv-mapped default +rep for a cool example
Remember all information is contextual and if I do not understand the context I cannot gras the information