@illbuzzo there is nothing that can stop u when u want to do some thing is there?
good work i really want this since it would make irrlicht comparable to the amp engine.
@ any one
any one have or know a permennant hosting service for free since they go down after exceeding the download limit
any way i will offer all my shaders here except the heat since i need to make it irrlicht compatible
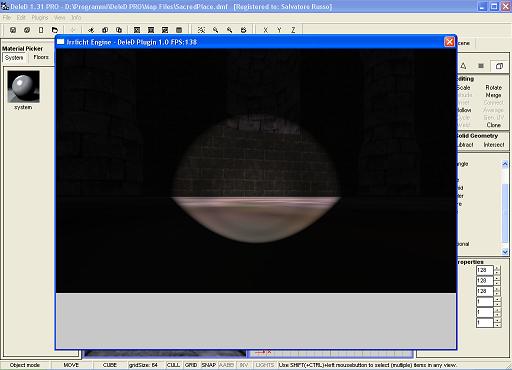
water SHADER
//!???C++ MAIN FILE???!@///
Code: Select all
/*
This tutorial shows how to use shaders for D3D8, D3D9 and OpenGL
with the engine and how to create new material types with them. It also
shows how to disable the generation of mipmaps at texture loading, and
how to use text scene nodes.

This tutorial does not explain how shaders work. I would recommend to read the D3D
or OpenGL  documentation, to search a tutorial, or to read a book about this.

At first, we need to include all headers and do the stuff we always do, like
in nearly all other tutorials:
*/
#include <irrlicht.h>
#include <iostream>


using namespace irr;

#pragma comment(lib, "Irrlicht.lib")


/*
Because we want to use some interesting shaders in this tutorials, we
need to set some data for them to make them able to compute nice
colors. In this example, we'll use a simple vertex shader which will
calculate the color of the vertex based on the position of the camera.
For this, the shader needs the following data: The inverted world matrix
for transforming the normal, the clip matrix for transforming the position,
the camera position and the world position of the object for the calculation
of the angle of light, and the color of the light. To be able to tell the
shader all this data every frame, we have to derive a class from the
IShaderConstantSetCallBack interface and override its only method,
namely OnSetConstants(). This method will be called every time the material
is set.
The method setVertexShaderConstant() of the IMaterialRendererServices interface
is used to set the data the shader needs. If the user chose to use a High Level shader
language like HLSL instead of Assembler in this example, you have to set the
variable name as parameter instead of the register index.
*/

IrrlichtDevice* device = 0;
bool UseHighLevelShaders = false;

class MyShaderCallBack : public video::IShaderConstantSetCallBack
{
public:

	virtual void OnSetConstants(video::IMaterialRendererServices* services)
	{
		video::IVideoDriver* driver = services->getVideoDriver();

		// set inverted world matrix
		// if we are using highlevel shaders (the user can select this when
		// starting the program), we must set the constants by name.

		core::matrix4 invWorld = driver->getTransform(video::ETS_WORLD);
		invWorld.makeInverse();

		if (UseHighLevelShaders)
			services->setVertexShaderConstant("mInvWorld", &invWorld.M[0], 16);
		else
			services->setVertexShaderConstant(&invWorld.M[0], 0, 4);

		// set clip matrix

		core::matrix4 worldViewProj;
		worldViewProj = driver->getTransform(video::ETS_PROJECTION);
		worldViewProj *= driver->getTransform(video::ETS_VIEW);
		worldViewProj *= driver->getTransform(video::ETS_WORLD);

		if (UseHighLevelShaders)
			services->setVertexShaderConstant("mWorldViewProj", &worldViewProj.M[0], 16);
		else
			services->setVertexShaderConstant(&worldViewProj.M[0], 4, 4);

		// set camera position

		core::vector3df pos = device->getSceneManager()->
			getActiveCamera()->getAbsolutePosition();

		if (UseHighLevelShaders)
			services->setVertexShaderConstant("mLightPos", reinterpret_cast<f32*>(&pos), 3);
		else
			services->setVertexShaderConstant(reinterpret_cast<f32*>(&pos), 8, 1);

		// set light color

		video::SColorf col(0.0f,1.0f,1.0f,0.0f);
			float time = (float)device->getTimer()->getTime()/1000;
			if (UseHighLevelShaders){
			services->setVertexShaderConstant("mLightColor", &time, 4);
			services->setPixelShaderConstant("mLightColor", &time, 4);}
		else
			services->setVertexShaderConstant(reinterpret_cast<f32*>(&col), 9, 1);

		// set transposed world matrix

		core::matrix4 world = driver->getTransform(video::ETS_WORLD);
		world = world.getTransposed();

		if (UseHighLevelShaders)
			services->setVertexShaderConstant("mTransWorld", &world.M[0], 16);
		else
			services->setVertexShaderConstant(&world.M[0], 10, 4);


	}
};

/*
	The next few lines start up the engine. Just like in most other tutorials
	before. But in addition, we ask the user if he wants this example to use
	high level shaders if he selected a driver which is capable of doing so.
*/
int main()
{
	// let user select driver type

	video::E_DRIVER_TYPE driverType = video::EDT_DIRECTX9;

	printf("Please select the driver you want for this example:\n"\
		" (a) Direct3D 9.0c\n (b) Direct3D 8.1\n (c) OpenGL 1.2\n"\
		" (d) Software Renderer\n (e) NullDevice\n (otherKey) exit\n\n");

	char i;
	std::cin >> i;

	switch(i)
	{
		case 'a': driverType = video::EDT_DIRECTX9;	break;
		case 'b': driverType = video::EDT_DIRECTX8;	break;
		case 'c': driverType = video::EDT_OPENGL;   break;
		case 'd': driverType = video::EDT_SOFTWARE; break;
		case 'e': driverType = video::EDT_NULL;     break;
		default: return 0;
	}

	// ask the user if we should use high level shaders for this example
	if (driverType == video::EDT_DIRECTX9)
	{
		printf("Please press 'y' if you want to use high level shaders.\n");
		std::cin >> i;
		if (i == 'y')
			UseHighLevelShaders = true;
	}

	// create device

	device = createDevice(driverType, core::dimension2d<s32>(800, 600));

	if (device == 0)
		return 1; // could not create selected driver.


	video::IVideoDriver* driver = device->getVideoDriver();
	scene::ISceneManager* smgr = device->getSceneManager();
	gui::IGUIEnvironment* gui = device->getGUIEnvironment();

	/*
	Now for the more interesting parts.
	If we are using Direct3D, we want to load vertex and pixel shader programs, if we have
	OpenGL, we want to use ARB fragment and vertex programs. I wrote the
	corresponding programs down into the files d3d8.ps, d3d8.vs, d3d9.ps, d3d9.vs,
	opengl.ps and opengl.vs. We only need the right filenames now. This is done in the
	following switch. Note, that it is not necessary to write the shaders into text
	files, like in this example. You can even write the shaders directly as strings
	into the cpp source file, and use later addShaderMaterial() instead of
	addShaderMaterialFromFiles().
	*/

	c8* vsFileName = 0; // filename for the vertex shader
	c8* psFileName = 0; // filename for the pixel shader

	switch(driverType)
	{
	case video::EDT_DIRECTX8:
		psFileName = "../../media/d3d8.psh";
		vsFileName = "../../media/d3d8.vsh";
		break;
	case video::EDT_DIRECTX9:
		if (UseHighLevelShaders)
		{
			psFileName = "d3d9.hlsl";
			vsFileName = psFileName; // both shaders are in the same file
		}
		else
		{
			psFileName = "../../media/d3d9.psh";
			vsFileName = "../../media/d3d9.vsh";
		}
		break;

	case video::EDT_OPENGL:
		psFileName = "../../media/opengl.psh";
		vsFileName = "../../media/opengl.vsh";
		break;
	}

	/*
	In addition, we check if the hardware and the selected renderer is capable
	of executing the shaders we want. If not, we simply set the filename string
	to 0. This is not necessary, but useful in this example: For example, if
	the hardware is able to execute vertex shaders but not pixel shaders, we create
	a new material which only uses the vertex shader, and no pixel shader.
	Otherwise, if we would tell the engine to create this material and the engine
	sees that the hardware wouldn't be able to fullfill the request completely,
	it would not create any new material at all. So in this example you would see
	at least the vertex shader in action, without the pixel shader.
	*/

	if (!driver->queryFeature(video::EVDF_PIXEL_SHADER_1_1) &&
		!driver->queryFeature(video::EVDF_ARB_FRAGMENT_PROGRAM_1))
	{
		device->getLogger()->log("WARNING: Pixel shaders disabled "\
			"because of missing driver/hardware support.");
		psFileName = 0;
	}

	if (!driver->queryFeature(video::EVDF_VERTEX_SHADER_1_1) &&
		!driver->queryFeature(video::EVDF_ARB_VERTEX_PROGRAM_1))
	{
		device->getLogger()->log("WARNING: Vertex shaders disabled "\
			"because of missing driver/hardware support.");
		vsFileName = 0;
	}

	/*
	Now lets create the new materials.
	As you maybe know from previous examples, a material type in the Irrlicht engine
	is set by simply changing the MaterialType value in the SMaterial struct. And this
	value is just a simple 32 bit value, like video::EMT_SOLID. So we only need the
	engine to create a new value for us which we can set there.
	To do this, we get a pointer to the IGPUProgrammingServices and call
	addShaderMaterialFromFiles(), which returns such a new 32 bit value. That's all.
	The parameters to this method are the following:
	First, the names of the files containing the code of the vertex and the pixel shader.
	If you would use addShaderMaterial() instead, you would not need file names, then you
	could write the code of the shader directly as string.
	The following parameter is a pointer to the IShaderConstantSetCallBack class we wrote
	at the beginning of this tutorial. If you don't want to set constants, set this to 0.
	The last paramter tells the engine which material it should use as base material.
	To demonstrate this, we create two materials with a different base material, one
	with EMT_SOLID and one with EMT_TRANSPARENT_ADD_COLOR.
	*/

	// create materials

	video::IGPUProgrammingServices* gpu = driver->getGPUProgrammingServices();
	s32 newMaterialType1 = 0;
	s32 newMaterialType2 = 0;

	if (gpu)
	{
		MyShaderCallBack* mc = new MyShaderCallBack();

		// create the shaders depending on if the user wanted high level
		// or low level shaders:

		if (UseHighLevelShaders)
		{
			// create material from high level shaders (hlsl or glsl)

			newMaterialType1 = gpu->addHighLevelShaderMaterialFromFiles(
				vsFileName,	"vertexMain", video::EVST_VS_1_1,
				psFileName, "pixelMain", video::EPST_PS_2_0,
				mc, video::EMT_SOLID);

			newMaterialType2 = gpu->addHighLevelShaderMaterialFromFiles(
				vsFileName,	"vertexMain", video::EVST_VS_1_1,
				psFileName, "pixelMain", video::EPST_PS_2_0,
				mc, video::EMT_SOLID);
		}
		else
		{
			// create material from low level shaders (asm or arb_asm)

			newMaterialType1 = gpu->addShaderMaterialFromFiles(vsFileName,
				psFileName, mc, video::EMT_SOLID);

			newMaterialType2 = gpu->addShaderMaterialFromFiles(vsFileName,
				psFileName, mc, video::EMT_SOLID);
		}

		mc->drop();
	}

	/*
	Now time for testing out the materials. We create a test cube
	and set the material we created. In addition, we add a text scene node to
	the cube and a rotatation animator, to make it look more interesting and
	important.
	*/video::ITexture* rt = 0;
	rt = driver->createRenderTargetTexture(core::dimension2d<s32>(1000,1000));

	scene::ICameraSceneNode* cam = smgr->addCameraSceneNodeFPS(0, 100.0f, 100.0f);
	cam->setPosition(core::vector3df(-100,50,100));
	cam->setTarget(core::vector3df(0,0,0));

	// create test scene node 1, with the new created material type 1
scene::ISceneNode* node1=0;
scene::ISceneNode* node2=0;
scene::ISceneNode* node=0;
 node2 = smgr->addTestSceneNode(50);
	node2->setPosition(core::vector3df(0,0,0));
node2->setMaterialTexture(0, driver->getTexture("noise.bmp"));
	node2->setMaterialType((video::E_MATERIAL_TYPE)newMaterialType1);

	smgr->addTextSceneNode(gui->getBuiltInFont(),
			L"PS & VS & EMT_SOLID",
			video::SColor(255,255,255,255),	node2);

	scene::ISceneNodeAnimator* anim = smgr->createRotationAnimator(
			core::vector3df(0,0.3f,0));
	//node->addAnimator(anim);
	//anim->drop();

	/*
	Same for the second cube, but with the second material we created.
	*/

	// create test scene node 2, with the new created material type 2


	node = smgr->addTestSceneNode(50);

	scene::ICameraSceneNode* rcam = smgr->addCameraSceneNode();
	rcam->setPosition(core::vector3df(0,0,100));
	node->setPosition(core::vector3df(0,-20,50));
	//node->setScale(core::vector3df(100,0.25,100));
	//node->setMaterialTexture(0, driver->getTexture("../../media/irrlicht2_up.jpg"));
	node->setMaterialType((video::E_MATERIAL_TYPE)newMaterialType2);
node->setMaterialTexture(0, rt); // set material of cube to render target

	smgr->addTextSceneNode(gui->getBuiltInFont(),
			L"PS & VS & EMT_TRANSPARENT",
			video::SColor(255,255,255,255),	node);

	anim = smgr->createRotationAnimator(core::vector3df(0,0.3f,0));
	//node->addAnimator(anim);
	//anim->drop();

	/*
	Then we add a third cube without a shader on it, to be able to compare the
	cubes.
	*/

	// add a scene node with no shader

	node1 = smgr->addTestSceneNode(50);
	node1->setPosition(core::vector3df(0,50,25));
	node1->setMaterialTexture(0, driver->getTexture("wall.bmp"));
	smgr->addTextSceneNode(gui->getBuiltInFont(), L"NO SHADER",
		video::SColor(255,255,255,255), node1);

	/*
	And last, we add a skybox and a user controlled camera to the scene.
	For the skybox textures, we disable mipmap generation, because we don't
	need mipmaps on it.
	*/

	// add a nice skybox

	driver->setTextureCreationFlag(video::ETCF_CREATE_MIP_MAPS, false);

	smgr->addSkyBoxSceneNode(
		driver->getTexture("irrlicht2_up.jpg"),
		driver->getTexture("irrlicht2_dn.jpg"),
		driver->getTexture("irrlicht2_lf.jpg"),
		driver->getTexture("irrlicht2_rt.jpg"),
		driver->getTexture("irrlicht2_ft.jpg"),
		driver->getTexture("irrlicht2_bk.jpg"));

	driver->setTextureCreationFlag(video::ETCF_CREATE_MIP_MAPS, true);

	// add a camera and disable the mouse cursor

	device->getCursorControl()->setVisible(false);

	/*
	Now draw everything. That's all.
	*/

	int lastFPS = -1;

	while(device->run())
		if (device->isWindowActive())
	{
		driver->beginScene(true, true, video::SColor(255,0,0,0));
		// draw scene into render target

			// set render target texture
			driver->setRenderTarget(rt, true, true, video::SColor(0,0,0,255));

			// make cube invisible and set fixed camera as active camera
			node->setVisible(false);
			//node2->setVisible(false);
			smgr->setActiveCamera(cam);

			// draw whole scene into render buffer
			smgr->drawAll();

			// set back old render target
			driver->setRenderTarget(0);

			// make the cube visible and set the user controlled camera as active one
			node->setVisible(true);
			//node2->setVisible(true);
			smgr->setActiveCamera(cam);

		smgr->drawAll();
		driver->endScene();

		int fps = driver->getFPS();

		if (lastFPS != fps)
		{
		  core::stringw str = L"Irrlicht Engine - Vertex and pixel shader example [";
		  str += driver->getName();
		  str += "] FPS:";
		  str += fps;

		  device->setWindowCaption(str.c_str());
		  lastFPS = fps;
		}
	}

	device->drop();

	return 0;
}
////hlsl file///
Code: Select all
//-----------------------------------------------------------------------------
// Global variables
//-----------------------------------------------------------------------------
//float fTime;       // Light color
float4x4 mWorldViewProj;  // World * View * Projection transformation
float4x4 mInvWorld;       // Inverted world matrix
float4x4 mTransWorld;     // Transposed world matrix
float3 mLightPos;         // Light position
float4 mLightColor;       // Light color


// Vertex shader output structure
struct VS_OUTPUT
{
	float4 Position   : POSITION;   // vertex position
	float4 Diffuse    : COLOR0;     // vertex diffuse color
	float2 TexCoord   : TEXCOORD0;  // tex coords
};


VS_OUTPUT vertexMain( in float4 vPosition : POSITION,
                      in float3 vNormal   : NORMAL,
                      float2 texCoord     : TEXCOORD0 )
{
	VS_OUTPUT Output;

	// transform position to clip space
	Output.Position = mul(vPosition, mWorldViewProj);

	// transform normal
	float3 normal = mul(vNormal, mInvWorld);

	// renormalize normal
	normal = normalize(normal);

	// position in world coodinates
	float3 worldpos = mul(mTransWorld, vPosition);

	// calculate light vector, vtxpos - lightpos
	float3 lightVector = worldpos - mLightPos;

	// normalize light vector
	lightVector = normalize(lightVector);

	// calculate light color
	float3 tmp = dot(-lightVector, normal);
	tmp = lit(tmp.x, tmp.y, 1.0);

	tmp = mLightColor * tmp.y;
	Output.Diffuse = float4(tmp.x, tmp.y, tmp.z, 0);
	Output.TexCoord = texCoord;

	return Output;
}


// Pixel shader output structure
struct PS_OUTPUT
{
    float4 RGBColor : COLOR0;  // Pixel color
};


sampler2D tex0;
sampler2D tex1;
       // Light color

PS_OUTPUT pixelMain( float2 TexCoord : TEXCOORD0,
                     float4 Position : POSITION,
                     float4 Diffuse  : COLOR0 )
{
	PS_OUTPUT Output;
float fTime=0;
	//float4 col = tex2D( tex0, TexCoord );  // sample color map

mLightColor=sin(mLightColor*0.5);
	TexCoord.y = TexCoord.y + (sin(TexCoord.x*20)*mLightColor*0.05);
	TexCoord.x = TexCoord.x + (cos(TexCoord.y*20)*mLightColor*0.05);
//TexCoord.x  = (TexCoord.x  *mLightColor)-1000;


	float4  col= tex2D( tex1, TexCoord.xy);
	float4  col2= tex2D( tex1, TexCoord.yx);
	// multiply with diffuse and do other senseless operations
	Output.RGBColor = lerp(col, col2, saturate(0.5 + pow(7, 7)));
	Output.RGBColor.z *= 5.43*0.1;// makes it blueish
	Output.RGBColor.y *= 2.75*0.1;// makes it blueish
Output.RGBColor.x *= 1.5*.1;// makes it blueish
	return Output;
}
========================================
toon shader
=======================================
c++ main file
Code: Select all
/*
This tutorial shows how to use shaders for D3D8, D3D9 and OpenGL
with the engine and how to create new material types with them. It also
shows how to disable the generation of mipmaps at texture loading, and
how to use text scene nodes.

This tutorial does not explain how shaders work. I would recommend to read the D3D
or OpenGL  documentation, to search a tutorial, or to read a book about this.

At first, we need to include all headers and do the stuff we always do, like
in nearly all other tutorials:
*/
#include <irrlicht.h>
#include <iostream>


using namespace irr;

#pragma comment(lib, "Irrlicht.lib")


/*
Because we want to use some interesting shaders in this tutorials, we
need to set some data for them to make them able to compute nice
colors. In this example, we'll use a simple vertex shader which will
calculate the color of the vertex based on the position of the camera.
For this, the shader needs the following data: The inverted world matrix
for transforming the normal, the clip matrix for transforming the position,
the camera position and the world position of the object for the calculation
of the angle of light, and the color of the light. To be able to tell the
shader all this data every frame, we have to derive a class from the
IShaderConstantSetCallBack interface and override its only method,
namely OnSetConstants(). This method will be called every time the material
is set.
The method setVertexShaderConstant() of the IMaterialRendererServices interface
is used to set the data the shader needs. If the user chose to use a High Level shader
language like HLSL instead of Assembler in this example, you have to set the
variable name as parameter instead of the register index.
*/

IrrlichtDevice* device = 0;
bool UseHighLevelShaders = false;
class MyShaderCallBack : public video::IShaderConstantSetCallBack
{
public:
virtual void OnSetConstants(video::IMaterialRendererServices* services)
{
video::IVideoDriver* driver = services->getVideoDriver();

// set inverted world matrix
// if we are using highlevel shaders (the user can select this when
// starting the program), we must set the constants by name.
core::matrix4 invWorld = driver->getTransform(video::ETS_WORLD);
invWorld.makeInverse();

if (UseHighLevelShaders)
services->setVertexShaderConstant("mInvWorld", &invWorld.M[0], 16);
else
services->setVertexShaderConstant(&invWorld.M[0], 0, 4);

// set clip matrix
core::matrix4 worldViewProj;
worldViewProj = driver->getTransform(video::ETS_PROJECTION);
worldViewProj *= driver->getTransform(video::ETS_VIEW);
worldViewProj *= driver->getTransform(video::ETS_WORLD);

if (UseHighLevelShaders)
services->setVertexShaderConstant("mWorldViewProj", &worldViewProj.M[0], 16);
else
services->setVertexShaderConstant(&worldViewProj.M[0], 4, 4);

		    // set camera position
   core::vector3df pos = device->getSceneManager()->    getActiveCamera()->getAbsolutePosition();
   if (UseHighLevelShaders)      services->setVertexShaderConstant("mLightPos", reinterpret_cast<f32*>(&pos), 3);
   else      services->setVertexShaderConstant(reinterpret_cast<f32*>(&pos), 8, 1);

// set transposed world matrix
core::matrix4 world = driver->getTransform(video::ETS_WORLD);
world = world.getTransposed();

if (UseHighLevelShaders)
services->setVertexShaderConstant("mTransWorld", &world.M[0], 16);
else
services->setVertexShaderConstant(&world.M[0], 10, 4);
}
};

/*
	The next few lines start up the engine. Just like in most other tutorials
	before. But in addition, we ask the user if he wants this example to use
	high level shaders if he selected a driver which is capable of doing so.
*/
int main()
{
	// let user select driver type

	video::E_DRIVER_TYPE driverType = video::EDT_DIRECTX9;

	printf("Please select the driver you want for this example:\n"\
		" (a) Direct3D 9.0c\n (b) Direct3D 8.1\n (c) OpenGL 1.2\n"\
		" (d) Software Renderer\n (e) NullDevice\n (otherKey) exit\n\n");

	char i;
	std::cin >> i;

	switch(i)
	{
		case 'a': driverType = video::EDT_DIRECTX9;	break;
		case 'b': driverType = video::EDT_DIRECTX8;	break;
		case 'c': driverType = video::EDT_OPENGL;   break;
		case 'd': driverType = video::EDT_SOFTWARE; break;
		case 'e': driverType = video::EDT_NULL;     break;
		default: return 0;
	}

	// ask the user if we should use high level shaders for this example
	if (driverType == video::EDT_DIRECTX9)
	{
		printf("Please press 'y' if you want to use high level shaders.\n");
		std::cin >> i;
		if (i == 'y')
			UseHighLevelShaders = true;
	}

	// create device

	device = createDevice(driverType, core::dimension2d<s32>(800, 600));

	if (device == 0)
		return 1; // could not create selected driver.


	video::IVideoDriver* driver = device->getVideoDriver();
	scene::ISceneManager* smgr = device->getSceneManager();
	gui::IGUIEnvironment* gui = device->getGUIEnvironment();

	/*
	Now for the more interesting parts.
	If we are using Direct3D, we want to load vertex and pixel shader programs, if we have
	OpenGL, we want to use ARB fragment and vertex programs. I wrote the
	corresponding programs down into the files d3d8.ps, d3d8.vs, d3d9.ps, d3d9.vs,
	opengl.ps and opengl.vs. We only need the right filenames now. This is done in the
	following switch. Note, that it is not necessary to write the shaders into text
	files, like in this example. You can even write the shaders directly as strings
	into the cpp source file, and use later addShaderMaterial() instead of
	addShaderMaterialFromFiles().
	*/

	c8* vsFileName = 0; // filename for the vertex shader
	c8* psFileName = 0; // filename for the pixel shader

	switch(driverType)
	{
	case video::EDT_DIRECTX8:
		psFileName = "../../media/d3d8.psh";
		vsFileName = "../../media/d3d8.vsh";
		break;
	case video::EDT_DIRECTX9:
		if (UseHighLevelShaders)
		{
			psFileName = "d3d9.hlsl";
			vsFileName = psFileName; // both shaders are in the same file
		}
		else
		{
			psFileName = "../../media/d3d9.psh";
			vsFileName = "../../media/d3d9.vsh";
		}
		break;

	case video::EDT_OPENGL:
		psFileName = "../../media/opengl.psh";
		vsFileName = "../../media/opengl.vsh";
		break;
	}

	/*
	In addition, we check if the hardware and the selected renderer is capable
	of executing the shaders we want. If not, we simply set the filename string
	to 0. This is not necessary, but useful in this example: For example, if
	the hardware is able to execute vertex shaders but not pixel shaders, we create
	a new material which only uses the vertex shader, and no pixel shader.
	Otherwise, if we would tell the engine to create this material and the engine
	sees that the hardware wouldn't be able to fullfill the request completely,
	it would not create any new material at all. So in this example you would see
	at least the vertex shader in action, without the pixel shader.
	*/

	if (!driver->queryFeature(video::EVDF_PIXEL_SHADER_1_1) &&
		!driver->queryFeature(video::EVDF_ARB_FRAGMENT_PROGRAM_1))
	{
		device->getLogger()->log("WARNING: Pixel shaders disabled "\
			"because of missing driver/hardware support.");
		psFileName = 0;
	}

	if (!driver->queryFeature(video::EVDF_VERTEX_SHADER_1_1) &&
		!driver->queryFeature(video::EVDF_ARB_VERTEX_PROGRAM_1))
	{
		device->getLogger()->log("WARNING: Vertex shaders disabled "\
			"because of missing driver/hardware support.");
		vsFileName = 0;
	}

	/*
	Now lets create the new materials.
	As you maybe know from previous examples, a material type in the Irrlicht engine
	is set by simply changing the MaterialType value in the SMaterial struct. And this
	value is just a simple 32 bit value, like video::EMT_SOLID. So we only need the
	engine to create a new value for us which we can set there.
	To do this, we get a pointer to the IGPUProgrammingServices and call
	addShaderMaterialFromFiles(), which returns such a new 32 bit value. That's all.
	The parameters to this method are the following:
	First, the names of the files containing the code of the vertex and the pixel shader.
	If you would use addShaderMaterial() instead, you would not need file names, then you
	could write the code of the shader directly as string.
	The following parameter is a pointer to the IShaderConstantSetCallBack class we wrote
	at the beginning of this tutorial. If you don't want to set constants, set this to 0.
	The last paramter tells the engine which material it should use as base material.
	To demonstrate this, we create two materials with a different base material, one
	with EMT_SOLID and one with EMT_TRANSPARENT_ADD_COLOR.
	*/

	// create materials

	video::IGPUProgrammingServices* gpu = driver->getGPUProgrammingServices();
	s32 newMaterialType1 = 0;
	s32 newMaterialType2 = 0;

	if (gpu)
	{
		MyShaderCallBack* mc = new MyShaderCallBack();

		// create the shaders depending on if the user wanted high level
		// or low level shaders:

		if (UseHighLevelShaders)
		{
			// create material from high level shaders (hlsl or glsl)

			newMaterialType1 = gpu->addHighLevelShaderMaterialFromFiles(
				vsFileName,	"vertexMain", video::EVST_VS_1_1,
				psFileName, "pixelMain", video::EPST_PS_2_0,
				mc, video::EMT_SOLID_2_LAYER);

			newMaterialType2 = gpu->addHighLevelShaderMaterialFromFiles(
				vsFileName,	"vertexMain", video::EVST_VS_1_1,
				psFileName, "pixelMain", video::EPST_PS_2_0,
				mc, video::EMT_SOLID);
		}
		else
		{
			// create material from low level shaders (asm or arb_asm)

			newMaterialType1 = gpu->addShaderMaterialFromFiles(vsFileName,
				psFileName, mc, video::EMT_SOLID);

			newMaterialType2 = gpu->addShaderMaterialFromFiles(vsFileName,
				psFileName, mc, video::EMT_SOLID);
		}

		mc->drop();
	}
scene::ICameraSceneNode* cam = smgr->addCameraSceneNodeFPS(0, 100.0f, 100.0f);


	// create test scene node 1, with the new created material type 1
scene::IAnimatedMesh* mesh = smgr->getMesh("gun.x");
scene::IAnimatedMeshSceneNode* node = smgr->addAnimatedMeshSceneNode(mesh);
node->setPosition(core::vector3df(100,100,100));	node->setMaterialTexture(0, driver->getTexture("gun.jpg"));	node->setMaterialType((video::E_MATERIAL_TYPE)newMaterialType1);
node->setScale(core::vector3df(3,3,3));
	driver->setTextureCreationFlag(video::ETCF_CREATE_MIP_MAPS, false);

	smgr->addSkyBoxSceneNode(
		driver->getTexture("irrlicht2_up.jpg"),
		driver->getTexture("irrlicht2_dn.jpg"),
		driver->getTexture("irrlicht2_lf.jpg"),
		driver->getTexture("irrlicht2_rt.jpg"),
		driver->getTexture("irrlicht2_ft.jpg"),
		driver->getTexture("irrlicht2_bk.jpg"));

	driver->setTextureCreationFlag(video::ETCF_CREATE_MIP_MAPS, true);


	// add terrain scene node
	scene::ITerrainSceneNode* terrain = smgr->addTerrainSceneNode(       "noise.bmp");terrain->setScale(core::vector3df(40, 1, 40));terrain->setMaterialType((video::E_MATERIAL_TYPE)newMaterialType1);terrain->setMaterialTexture(0, driver->getTexture(     "tex.jpg"));
	// add a camera and disable the mouse cursor

	device->getCursorControl()->setVisible(false);

	/*
	Now draw everything. That's all.
	*/

	int lastFPS = -1;

	while(device->run())
		if (device->isWindowActive())
	{
		driver->beginScene(true, true, video::SColor(255,0,0,0));
		// draw scene into render target


		smgr->drawAll();
		driver->endScene();

		int fps = driver->getFPS();

		if (lastFPS != fps)
		{
		  core::stringw str = L"Irrlicht Engine - Vertex and pixel shader example [";
		  str += driver->getName();
		  str += "] FPS:";
		  str += fps;

		  device->setWindowCaption(str.c_str());
		  lastFPS = fps;
		}
	}

	device->drop();

	return 0;
}
tooon shader hlsl
Code: Select all
//-----------------------------------------------------------------------------
// Global variables
//-----------------------------------------------------------------------------
//float fTime;       // Light color
float4x4 mWorldViewProj;  // World * View * Projection transformation
float4x4 mInvWorld;       // Inverted world matrix
float4x4 mTransWorld;     // Transposed world matrix
float3 mLightPos;         // Light position
float4 mLightColor;       // Light color

struct VS_OUTPUT
{
   float4 Position: POSITION0;
   float2 TexCoord: TEXCOORD0;
   float3 Normal:   TEXCOORD1;


};

VS_OUTPUT vertexMain(
   float4 Position: POSITION0,
   float2 TexCoord: TEXCOORD0,
   float3 Normal:   NORMAL0)
{
   VS_OUTPUT Output;


   float4x4 matTransform = { 1.0f, 0.0f, 0.0f, 0.0f,
                             0.0f, 1.0f, 0.0f, 0.0f,
                             0.0f, 0.0f, 1.0f, 0.0f,
                             0.0f, 0.0f, 0.0f, 1.0f };

     matTransform = mWorldViewProj;


   Output.Position = mul(Position, mWorldViewProj);
float3 worldpos = mul(mWorldViewProj, Position);
   Output.TexCoord = TexCoord;
float3 normal = mul(Normal ,mInvWorld);

   Output.Normal = ( mul( matTransform, Normal ) + 1.0f ) / 2.0f;
  //Output.Normal = normalize(Normal);

   return( Output );

}


sampler2D tex0;

float4 pixelMain(
   float2 TexCoord: TEXCOORD0,
   float3 Normal:   TEXCOORD1,
   float3 Binormal: TEXCOORD2,
   float3 Tangent:  TEXCOORD3 ) : COLOR0
{
   //  Output constant color:
   //float4 color = float4( 0.0f, 0.0f, 0.0f, 0.0f );
 float3 lightDir=float3(0.5,0.3,0.5);

 float intensity=dot(lightDir,Normal);
 float4 color=float4(1,1,1,1);

 if (intensity > 0.95)
  color = float4(1.0,0.5,0.5,1.0);
  else if (intensity > 0.65)
  color = float4(0.6,0.3,0.3,1.0);
  else if (intensity > 0.45)
  color = float4(0.4,0.2,0.2,1.0);
  else
  color = float4(0,0,0,0);

   float4 col = tex2D( tex0, TexCoord);

   col*=2;
   return( color*col );

}
night vision and fake bumpmaps
c++
Code: Select all
/*
This tutorial shows how to use shaders for D3D8, D3D9 and OpenGL
with the engine and how to create new material types with them. It also
shows how to disable the generation of mipmaps at texture loading, and
how to use text scene nodes.

This tutorial does not explain how shaders work. I would recommend to read the D3D
or OpenGL  documentation, to search a tutorial, or to read a book about this.

At first, we need to include all headers and do the stuff we always do, like
in nearly all other tutorials:
*/
#include <irrlicht.h>
#include <iostream>


using namespace irr;

#pragma comment(lib, "Irrlicht.lib")


/*
Because we want to use some interesting shaders in this tutorials, we
need to set some data for them to make them able to compute nice
colors. In this example, we'll use a simple vertex shader which will
calculate the color of the vertex based on the position of the camera.
For this, the shader needs the following data: The inverted world matrix
for transforming the normal, the clip matrix for transforming the position,
the camera position and the world position of the object for the calculation
of the angle of light, and the color of the light. To be able to tell the
shader all this data every frame, we have to derive a class from the
IShaderConstantSetCallBack interface and override its only method,
namely OnSetConstants(). This method will be called every time the material
is set.
The method setVertexShaderConstant() of the IMaterialRendererServices interface
is used to set the data the shader needs. If the user chose to use a High Level shader
language like HLSL instead of Assembler in this example, you have to set the
variable name as parameter instead of the register index.
*/

IrrlichtDevice* device = 0;
bool UseHighLevelShaders = false;

class MyShaderCallBack : public video::IShaderConstantSetCallBack
{
public:

	virtual void OnSetConstants(video::IMaterialRendererServices* services)
	{
		video::IVideoDriver* driver = services->getVideoDriver();

		// set inverted world matrix
		// if we are using highlevel shaders (the user can select this when
		// starting the program), we must set the constants by name.

		core::matrix4 invWorld = driver->getTransform(video::ETS_WORLD);
		invWorld.makeInverse();

		if (UseHighLevelShaders)
			services->setVertexShaderConstant("mInvWorld", &invWorld.M[0], 16);
		else
			services->setVertexShaderConstant(&invWorld.M[0], 0, 4);

		// set clip matrix

		core::matrix4 worldViewProj;
		worldViewProj = driver->getTransform(video::ETS_PROJECTION);
		worldViewProj *= driver->getTransform(video::ETS_VIEW);
		worldViewProj *= driver->getTransform(video::ETS_WORLD);

		if (UseHighLevelShaders)
			services->setVertexShaderConstant("mWorldViewProj", &worldViewProj.M[0], 16);
		else
			services->setVertexShaderConstant(&worldViewProj.M[0], 4, 4);

		// set camera position

		core::vector3df pos = device->getSceneManager()->
			getActiveCamera()->getAbsolutePosition();

		if (UseHighLevelShaders)
			services->setVertexShaderConstant("mLightPos", reinterpret_cast<f32*>(&pos), 3);
		else
			services->setVertexShaderConstant(reinterpret_cast<f32*>(&pos), 8, 1);

		// set light color

		video::SColorf col(0.0f,1.0f,1.0f,0.0f);
			float time = (float)device->getTimer()->getTime()/1000;
			if (UseHighLevelShaders){
			services->setVertexShaderConstant("mLightColor", &time, 4);
			services->setPixelShaderConstant("mLightColor", &time, 4);}
		else
			services->setVertexShaderConstant(reinterpret_cast<f32*>(&col), 9, 1);

		// set transposed world matrix

		core::matrix4 world = driver->getTransform(video::ETS_WORLD);
		world = world.getTransposed();

		if (UseHighLevelShaders)
			services->setVertexShaderConstant("mTransWorld", &world.M[0], 16);
		else
			services->setVertexShaderConstant(&world.M[0], 10, 4);


	}
};

/*
	The next few lines start up the engine. Just like in most other tutorials
	before. But in addition, we ask the user if he wants this example to use
	high level shaders if he selected a driver which is capable of doing so.
*/
int main()
{
	// let user select driver type

	video::E_DRIVER_TYPE driverType = video::EDT_DIRECTX9;

	printf("Please select the driver you want for this example:\n"\
		" (a) Direct3D 9.0c\n (b) Direct3D 8.1\n (c) OpenGL 1.2\n"\
		" (d) Software Renderer\n (e) NullDevice\n (otherKey) exit\n\n");

	char i;
	std::cin >> i;

	switch(i)
	{
		case 'a': driverType = video::EDT_DIRECTX9;	break;
		case 'b': driverType = video::EDT_DIRECTX8;	break;
		case 'c': driverType = video::EDT_OPENGL;   break;
		case 'd': driverType = video::EDT_SOFTWARE; break;
		case 'e': driverType = video::EDT_NULL;     break;
		default: return 0;
	}

	// ask the user if we should use high level shaders for this example
	if (driverType == video::EDT_DIRECTX9)
	{
		printf("Please press 'y' if you want to use high level shaders.\n");
		std::cin >> i;
		if (i == 'y')
			UseHighLevelShaders = true;
	}

	// create device

	device = createDevice(driverType, core::dimension2d<s32>(800, 600));

	if (device == 0)
		return 1; // could not create selected driver.


	video::IVideoDriver* driver = device->getVideoDriver();
	scene::ISceneManager* smgr = device->getSceneManager();
	gui::IGUIEnvironment* gui = device->getGUIEnvironment();

	/*
	Now for the more interesting parts.
	If we are using Direct3D, we want to load vertex and pixel shader programs, if we have
	OpenGL, we want to use ARB fragment and vertex programs. I wrote the
	corresponding programs down into the files d3d8.ps, d3d8.vs, d3d9.ps, d3d9.vs,
	opengl.ps and opengl.vs. We only need the right filenames now. This is done in the
	following switch. Note, that it is not necessary to write the shaders into text
	files, like in this example. You can even write the shaders directly as strings
	into the cpp source file, and use later addShaderMaterial() instead of
	addShaderMaterialFromFiles().
	*/

	c8* vsFileName = 0; // filename for the vertex shader
	c8* psFileName = 0; // filename for the pixel shader

	switch(driverType)
	{
	case video::EDT_DIRECTX8:
		psFileName = "../../media/d3d8.psh";
		vsFileName = "../../media/d3d8.vsh";
		break;
	case video::EDT_DIRECTX9:
		if (UseHighLevelShaders)
		{
			psFileName = "d3d9.hlsl";
			vsFileName = psFileName; // both shaders are in the same file
		}
		else
		{
			psFileName = "../../media/d3d9.psh";
			vsFileName = "../../media/d3d9.vsh";
		}
		break;

	case video::EDT_OPENGL:
		psFileName = "../../media/opengl.psh";
		vsFileName = "../../media/opengl.vsh";
		break;
	}

	/*
	In addition, we check if the hardware and the selected renderer is capable
	of executing the shaders we want. If not, we simply set the filename string
	to 0. This is not necessary, but useful in this example: For example, if
	the hardware is able to execute vertex shaders but not pixel shaders, we create
	a new material which only uses the vertex shader, and no pixel shader.
	Otherwise, if we would tell the engine to create this material and the engine
	sees that the hardware wouldn't be able to fullfill the request completely,
	it would not create any new material at all. So in this example you would see
	at least the vertex shader in action, without the pixel shader.
	*/

	if (!driver->queryFeature(video::EVDF_PIXEL_SHADER_1_1) &&
		!driver->queryFeature(video::EVDF_ARB_FRAGMENT_PROGRAM_1))
	{
		device->getLogger()->log("WARNING: Pixel shaders disabled "\
			"because of missing driver/hardware support.");
		psFileName = 0;
	}

	if (!driver->queryFeature(video::EVDF_VERTEX_SHADER_1_1) &&
		!driver->queryFeature(video::EVDF_ARB_VERTEX_PROGRAM_1))
	{
		device->getLogger()->log("WARNING: Vertex shaders disabled "\
			"because of missing driver/hardware support.");
		vsFileName = 0;
	}

	/*
	Now lets create the new materials.
	As you maybe know from previous examples, a material type in the Irrlicht engine
	is set by simply changing the MaterialType value in the SMaterial struct. And this
	value is just a simple 32 bit value, like video::EMT_SOLID. So we only need the
	engine to create a new value for us which we can set there.
	To do this, we get a pointer to the IGPUProgrammingServices and call
	addShaderMaterialFromFiles(), which returns such a new 32 bit value. That's all.
	The parameters to this method are the following:
	First, the names of the files containing the code of the vertex and the pixel shader.
	If you would use addShaderMaterial() instead, you would not need file names, then you
	could write the code of the shader directly as string.
	The following parameter is a pointer to the IShaderConstantSetCallBack class we wrote
	at the beginning of this tutorial. If you don't want to set constants, set this to 0.
	The last paramter tells the engine which material it should use as base material.
	To demonstrate this, we create two materials with a different base material, one
	with EMT_SOLID and one with EMT_TRANSPARENT_ADD_COLOR.
	*/

	// create materials

	video::IGPUProgrammingServices* gpu = driver->getGPUProgrammingServices();
	s32 newMaterialType1 = 0;
	s32 newMaterialType2 = 0;

	if (gpu)
	{
		MyShaderCallBack* mc = new MyShaderCallBack();

		// create the shaders depending on if the user wanted high level
		// or low level shaders:

		if (UseHighLevelShaders)
		{
			// create material from high level shaders (hlsl or glsl)

			newMaterialType1 = gpu->addHighLevelShaderMaterialFromFiles(
				vsFileName,	"vertexMain", video::EVST_VS_1_1,
				psFileName, "pixelMain", video::EPST_PS_2_0,
				mc, video::EMT_SOLID);

			newMaterialType2 = gpu->addHighLevelShaderMaterialFromFiles(
				vsFileName,	"vertexMain", video::EVST_VS_1_1,
				psFileName, "pixelMain", video::EPST_PS_2_0,
				mc, video::EMT_SOLID);
		}
		else
		{
			// create material from low level shaders (asm or arb_asm)

			newMaterialType1 = gpu->addShaderMaterialFromFiles(vsFileName,
				psFileName, mc, video::EMT_SOLID);

			newMaterialType2 = gpu->addShaderMaterialFromFiles(vsFileName,
				psFileName, mc, video::EMT_SOLID);
		}

		mc->drop();
	}

	/*
	Now time for testing out the materials. We create a test cube
	and set the material we created. In addition, we add a text scene node to
	the cube and a rotatation animator, to make it look more interesting and
	important.
	*/video::ITexture* rt = 0;
	rt = driver->createRenderTargetTexture(core::dimension2d<s32>(1000,1000));

	scene::ICameraSceneNode* cam = smgr->addCameraSceneNodeFPS(0, 100.0f, 100.0f);
	cam->setPosition(core::vector3df(-100,50,100));
	cam->setTarget(core::vector3df(0,0,0));

	// create test scene node 1, with the new created material type 1
scene::ISceneNode* node1=0;
scene::ISceneNode* node2=0;
scene::ISceneNode* node=0;
 node2 = smgr->addTestSceneNode(50);
	node2->setPosition(core::vector3df(0,0,0));
node2->setMaterialTexture(0, driver->getTexture("noise.bmp"));
	node2->setMaterialType((video::E_MATERIAL_TYPE)newMaterialType1);

	smgr->addTextSceneNode(gui->getBuiltInFont(),
			L"PS & VS & EMT_SOLID",
			video::SColor(255,255,255,255),	node2);

	scene::ISceneNodeAnimator* anim = smgr->createRotationAnimator(
			core::vector3df(0,0.3f,0));
	//node->addAnimator(anim);
	//anim->drop();

	/*
	Same for the second cube, but with the second material we created.
	*/

	// create test scene node 2, with the new created material type 2
node = smgr->addBillboardSceneNode(cam, core::dimension2d<f32>(50, 50));
	node->setMaterialFlag(video::EMF_LIGHTING, false);

			node->setMaterialType((video::E_MATERIAL_TYPE)newMaterialType2);
node->setMaterialTexture(0, rt); // set material of cube to render target

	node->setPosition(core::vector3df(0,-20,50));
	//node->setScale(core::vector3df(100,0.25,100));
	//node->setMaterialTexture(0, driver->getTexture("../../media/irrlicht2_up.jpg"));


	smgr->addTextSceneNode(gui->getBuiltInFont(),
			L"PS & VS & EMT_TRANSPARENT",
			video::SColor(255,255,255,255),	node);

	anim = smgr->createRotationAnimator(core::vector3df(0,0.3f,0));
	//node->addAnimator(anim);
	//anim->drop();

	/*
	Then we add a third cube without a shader on it, to be able to compare the
	cubes.
	*/

	// add a scene node with no shader

	node1 = smgr->addTestSceneNode(50);
	node1->setPosition(core::vector3df(0,50,25));
	node1->setMaterialTexture(0, driver->getTexture("wall.jpg"));
	smgr->addTextSceneNode(gui->getBuiltInFont(), L"NO SHADER",
		video::SColor(0,0,255,255), node1);
node1->setMaterialType((video::E_MATERIAL_TYPE)newMaterialType2);
	/*
	And last, we add a skybox and a user controlled camera to the scene.
	For the skybox textures, we disable mipmap generation, because we don't
	need mipmaps on it.
	*/

	// add a nice skybox

	driver->setTextureCreationFlag(video::ETCF_CREATE_MIP_MAPS, false);

	smgr->addSkyBoxSceneNode(
		driver->getTexture("up.png"),
		driver->getTexture("dn.png"),
		driver->getTexture("lf.png"),
		driver->getTexture("rt.png"),
		driver->getTexture("ft.png"),
		driver->getTexture("bk.png"));

	driver->setTextureCreationFlag(video::ETCF_CREATE_MIP_MAPS, true);

	// add a camera and disable the mouse cursor

	device->getCursorControl()->setVisible(false);

	/*
	Now draw everything. That's all.
	*/

	int lastFPS = -1;

	while(device->run())
		if (device->isWindowActive())
	{
		driver->beginScene(true, true, video::SColor(255,0,0,0));
		// draw scene into render target

			// set render target texture
			driver->setRenderTarget(rt, true, true, video::SColor(0,0,0,255));

			// make cube invisible and set fixed camera as active camera
			node->setVisible(false);
			//node2->setVisible(false);
			smgr->setActiveCamera(cam);

			// draw whole scene into render buffer
			smgr->drawAll();

			// set back old render target
			driver->setRenderTarget(0);

			// make the cube visible and set the user controlled camera as active one
			node->setVisible(true);
			//node2->setVisible(true);
			smgr->setActiveCamera(cam);

		smgr->drawAll();
		driver->endScene();

		int fps = driver->getFPS();

		if (lastFPS != fps)
		{
		  core::stringw str = L"Irrlicht Engine - Vertex and pixel shader example [";
		  str += driver->getName();
		  str += "] FPS:";
		  str += fps;

		  device->setWindowCaption(str.c_str());
		  lastFPS = fps;
		}
	}

	device->drop();

	return 0;
}
.... hlsl
Code: Select all
//-----------------------------------------------------------------------------
// Global variables
//-----------------------------------------------------------------------------
//float fTime;       // Light color
float4x4 mWorldViewProj;  // World * View * Projection transformation
float4x4 mInvWorld;       // Inverted world matrix
float4x4 mTransWorld;     // Transposed world matrix
float3 mLightPos;         // Light position
float4 mLightColor;       // Light color


// Vertex shader output structure
struct VS_OUTPUT
{
	float4 Position   : POSITION;   // vertex position
	float4 Diffuse    : COLOR0;     // vertex diffuse color
	float2 TexCoord   : TEXCOORD0;  // tex coords
};


VS_OUTPUT vertexMain( in float4 vPosition : POSITION,
                      in float3 vNormal   : NORMAL,
                      float2 texCoord     : TEXCOORD0 )
{
	VS_OUTPUT Output;

	// transform position to clip space
	Output.Position = mul(vPosition, mWorldViewProj);

	// transform normal
	float3 normal = mul(vNormal, mInvWorld);

	// renormalize normal
	normal = normalize(normal);

	// position in world coodinates
	float3 worldpos = mul(mTransWorld, vPosition);

	// calculate light vector, vtxpos - lightpos
	float3 lightVector = worldpos - mLightPos;

	// normalize light vector
	lightVector = normalize(lightVector);

	// calculate light color
	float3 tmp = dot(-lightVector, normal);
	tmp = lit(tmp.x, tmp.y, 1.0);

	tmp = mLightColor * tmp.y;
	Output.Diffuse = float4(tmp.x, tmp.y, tmp.z, 0);
	Output.TexCoord = texCoord;

	return Output;
}


// Pixel shader output structure
struct PS_OUTPUT
{
    float4 RGBColor : COLOR0;  // Pixel color
};


sampler2D tex0;
sampler2D tex1;
PS_OUTPUT pixelMain( float2 TexCoord : TEXCOORD0,
                     float4 Position : POSITION,
                     float4 Diffuse  : COLOR0 )
{
	PS_OUTPUT Output;
float fTime=0;
	//float4 col = tex2D( tex0, TexCoord );  // sample color map

mLightColor=sin(mLightColor);//pulsating timer using timer in c++


	float4  col= tex2D( tex0, TexCoord.xy);
	//float4  col2= tex2D( tex1, TexCoord.yx);
	// multiply with diffuse and do other senseless operations

col.a = 1.0f;
col.rgb = 0.5f;
col -= tex2D( tex0, TexCoord.xy.xy)*mLightColor;
col += tex2D( tex0, TexCoord.xy.xy)*2.0f;
col.rgb = (col.r+col.g+col.b)/15.0f;

col.y=col.y*0.3;
col.x=col.z*0.1;
col.z=col.z*0.1;

	Output.RGBColor = (col*15);
	return Output;
}
heat shader not irrlicht ported yet
to change the transparency of the water compile with emt add color
bye
offer more ideas plz
the longest post in history